

Your first test in 10 minutes
In this tutorial you will:
- create an environment that says where the application is and how to sign in,
- create a test with five steps that signs in to a demo application,
- run it and read the result.
You need a running server and an account. See Installation and First sign-in.
The demo application
Section titled “The demo application”AutoTestX ships with a small single-page application called Fixture ERP at
conformance/fixtures/app.html. It has a sign-in screen, a Purchase Orders list and a
New Purchase Order form. It runs straight from disk, so you need no other server.
It accepts the user name tester and the password correct horse.
Step 1: create an environment
Section titled “Step 1: create an environment”An environment holds the address of the application and the credentials to use.
Tests refer to them by name ({{baseUrl}}, {{secret.APP_USER}}), so the same test can
run against UAT today and production tomorrow.
-
In the sidebar, under Configuration, choose Environments, then New environment.
-
Name it
Fixture UATand confirm.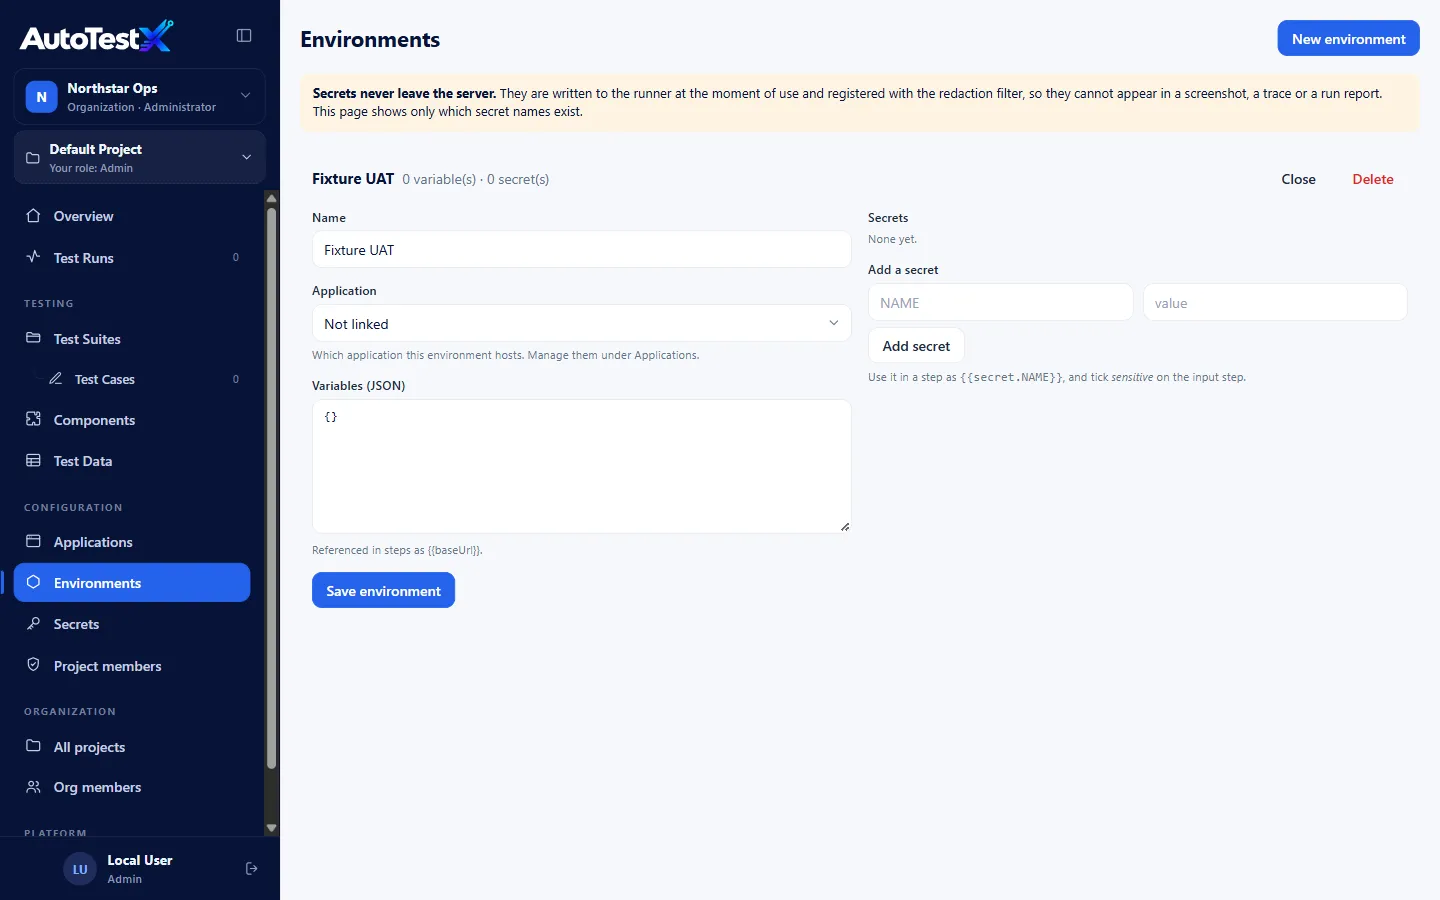
-
In Variables (JSON), enter the address of the demo application as a
file://URL. Use the real path to your project folder. Spaces become%20:{"baseUrl": "file:///D:/path/to/auto-test/conformance/fixtures/app.html"}Choose Save environment.
-
Under Add a secret, add two secrets, choosing Add secret after each:
NAME value APP_USERtesterAPP_PASSWORDcorrect horse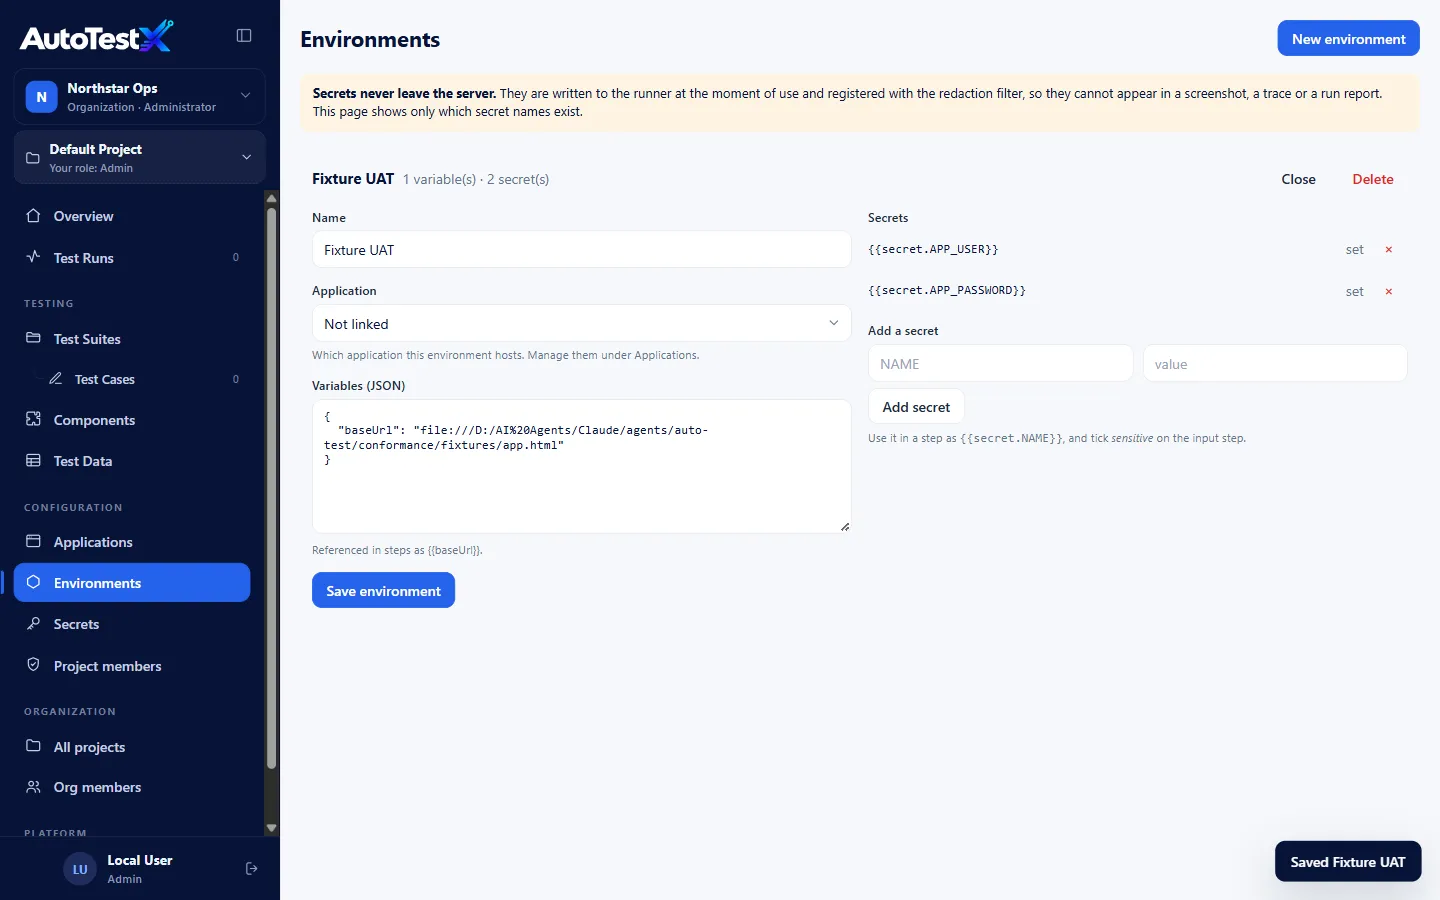
Secret values never leave the server again. Pages show only that a secret is set,
and reports show •••• instead of the value.
Step 2: create the test
Section titled “Step 2: create the test”-
Under Testing, choose Test Cases, then New test.
-
Name it
Sign in to Fixture ERP. Leave the suite as Unsorted and visibility as Shared. Choose Create.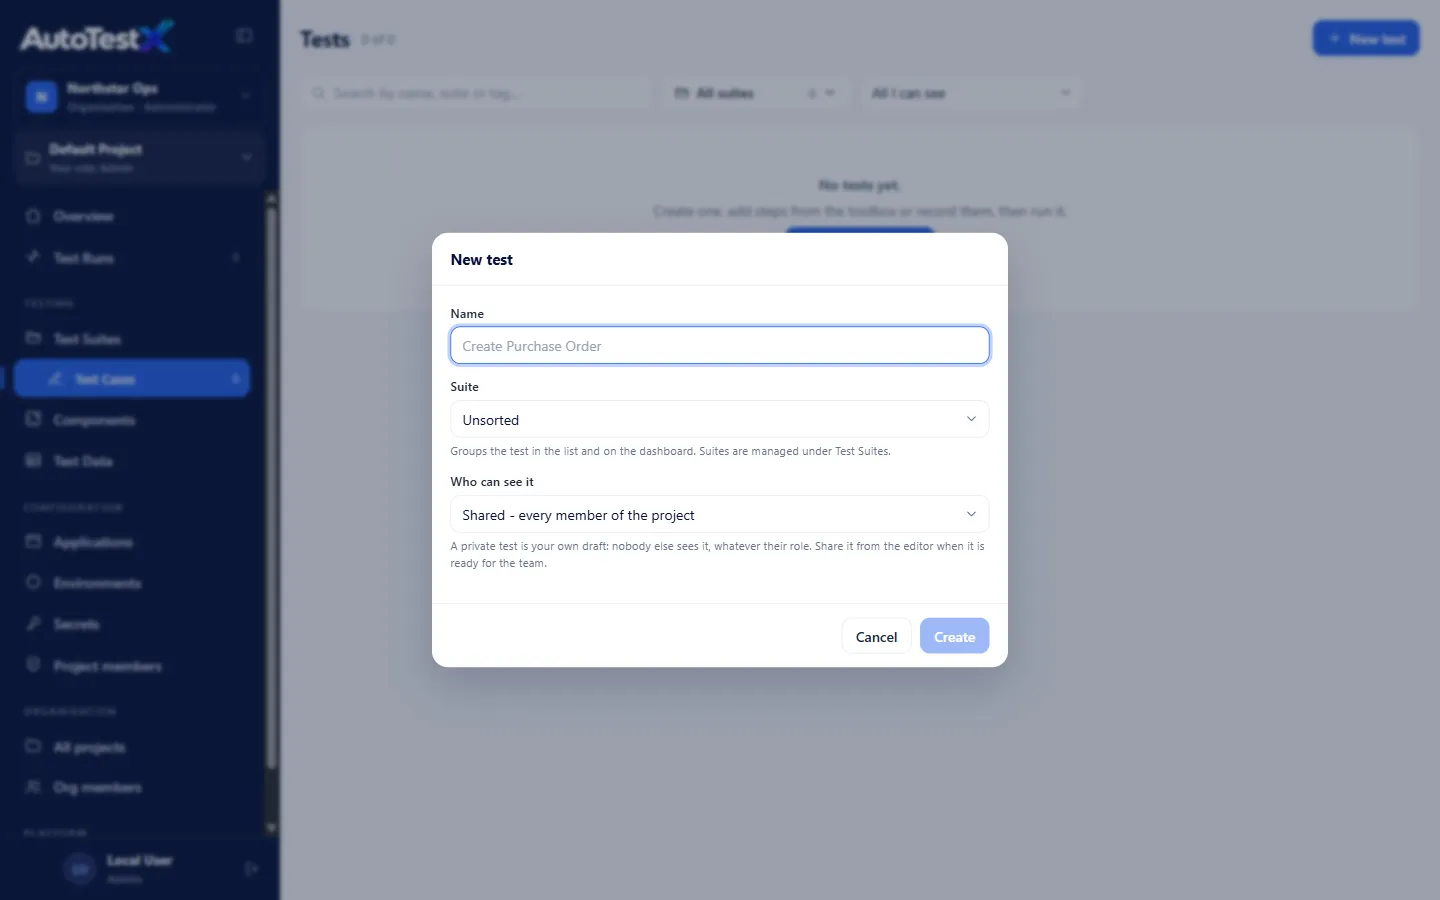
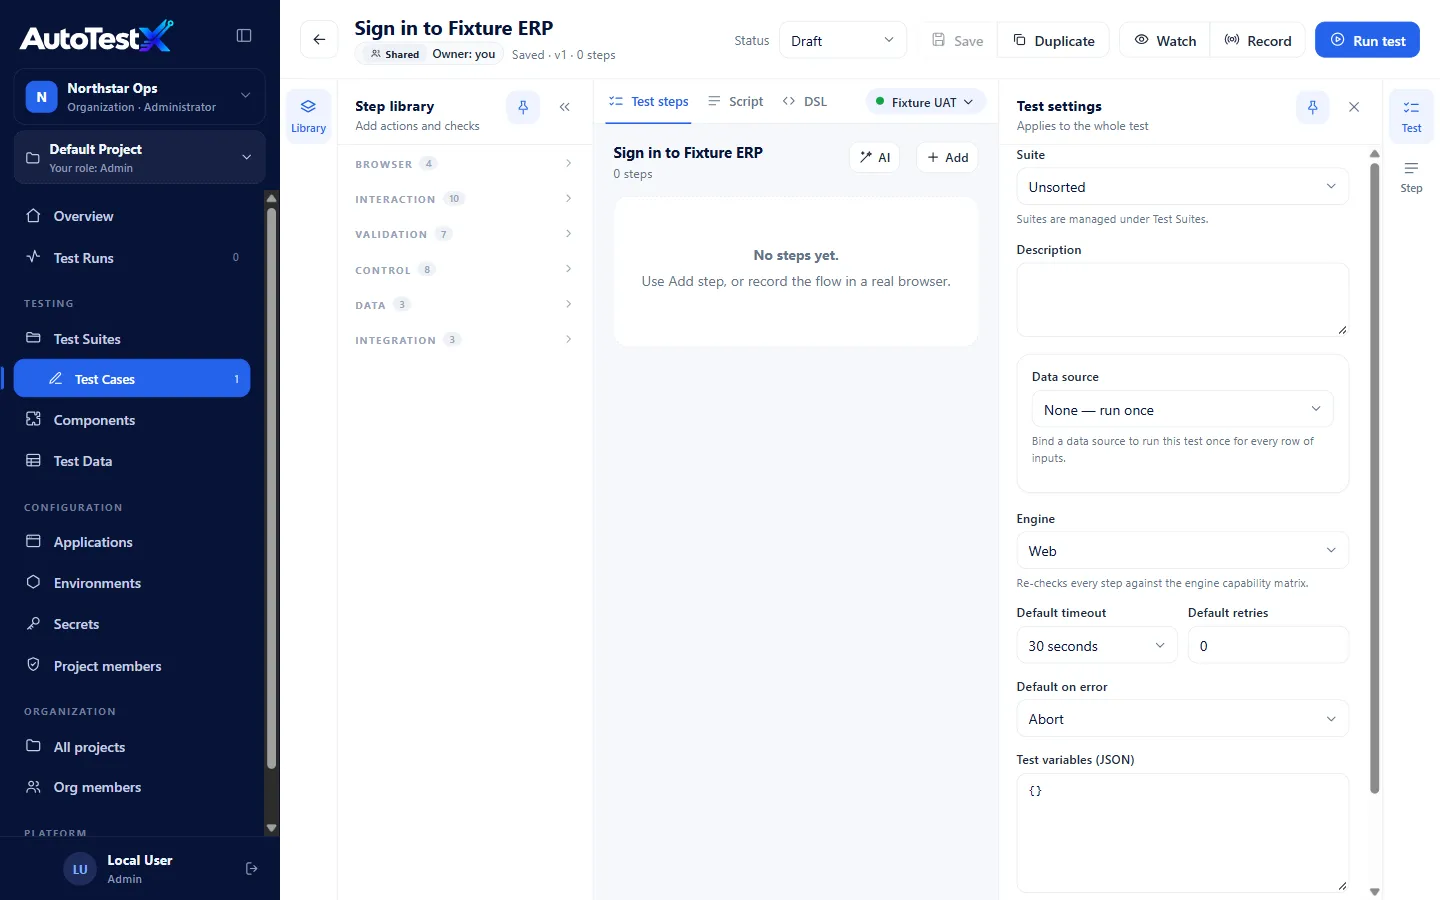
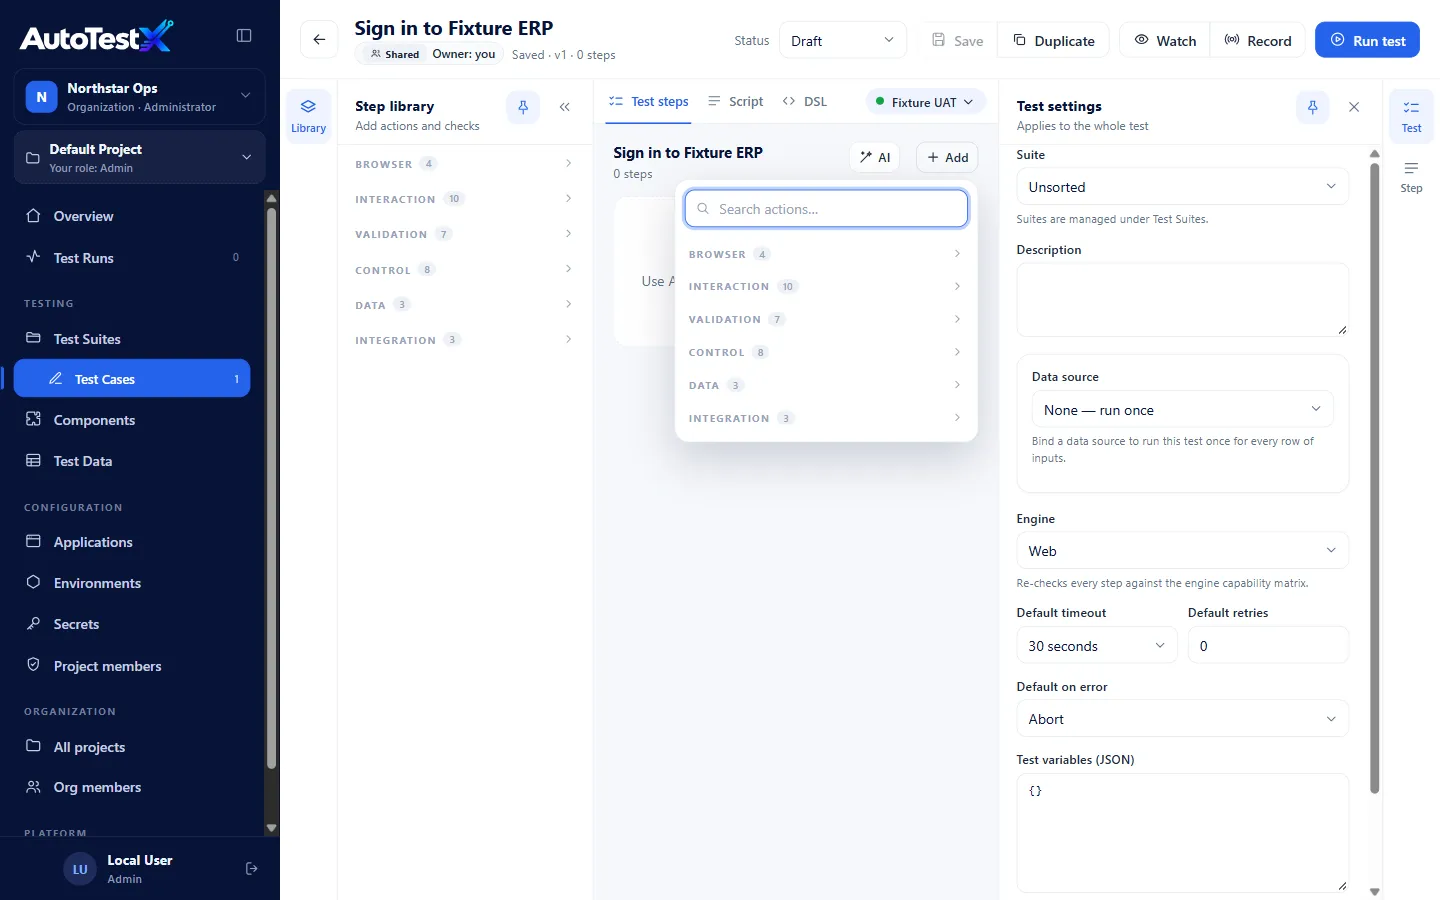
The test editor opens. On the left is the Step library, in the middle are the test’s steps, and on the right are the Test settings.
Step 3: add the steps
Section titled “Step 3: add the steps”Add steps with Add (above the steps). Type to search for an action and choose it. The new step’s Step properties open on the right.
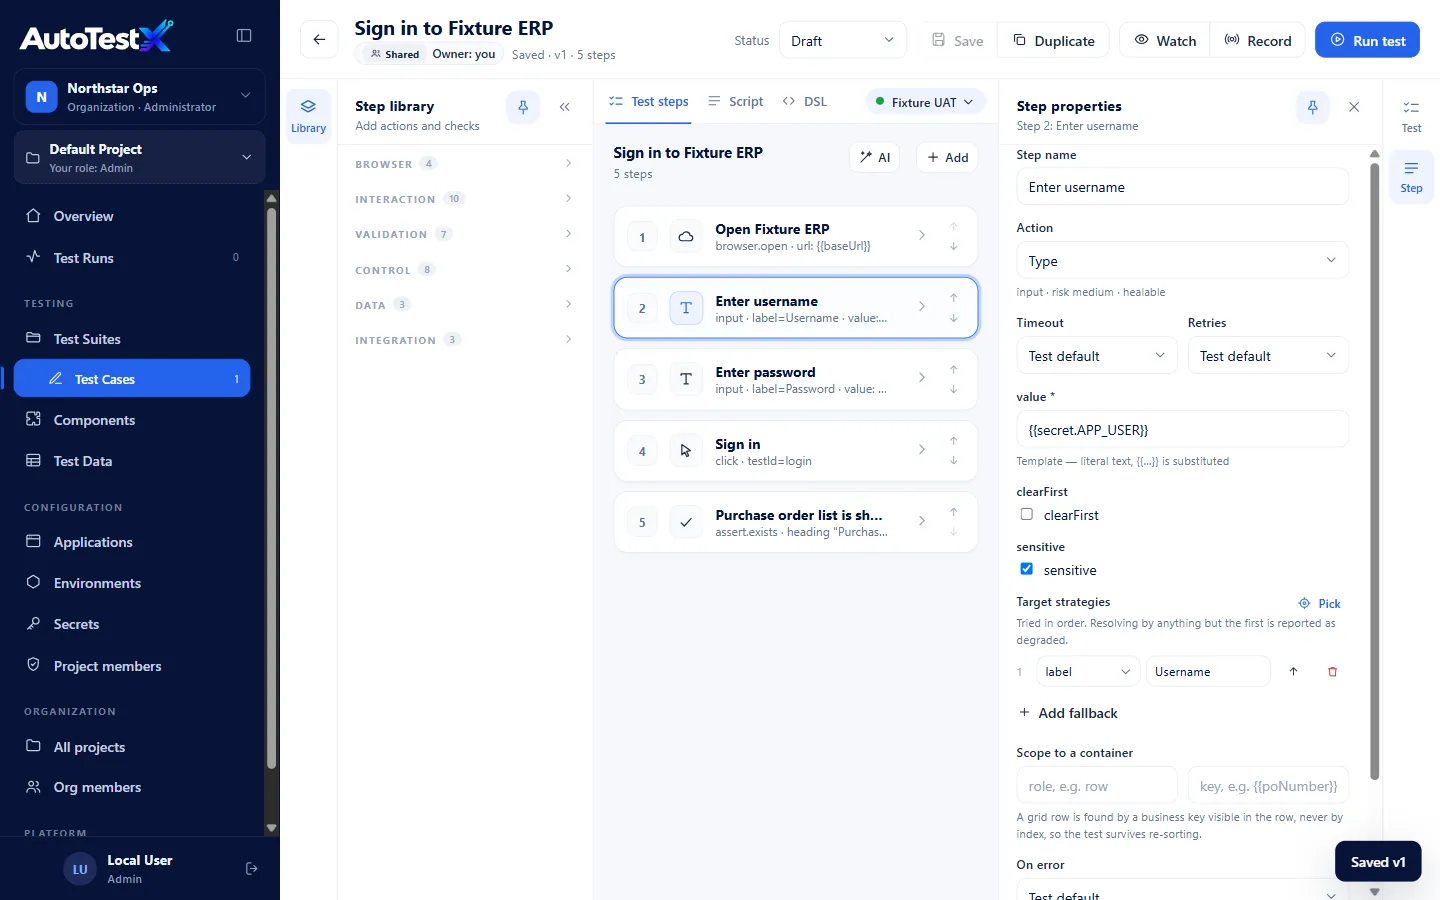
Add these five steps:
| # | Action | Step name | Settings |
|---|---|---|---|
| 1 | Open | Open Fixture ERP | url: {{baseUrl}} |
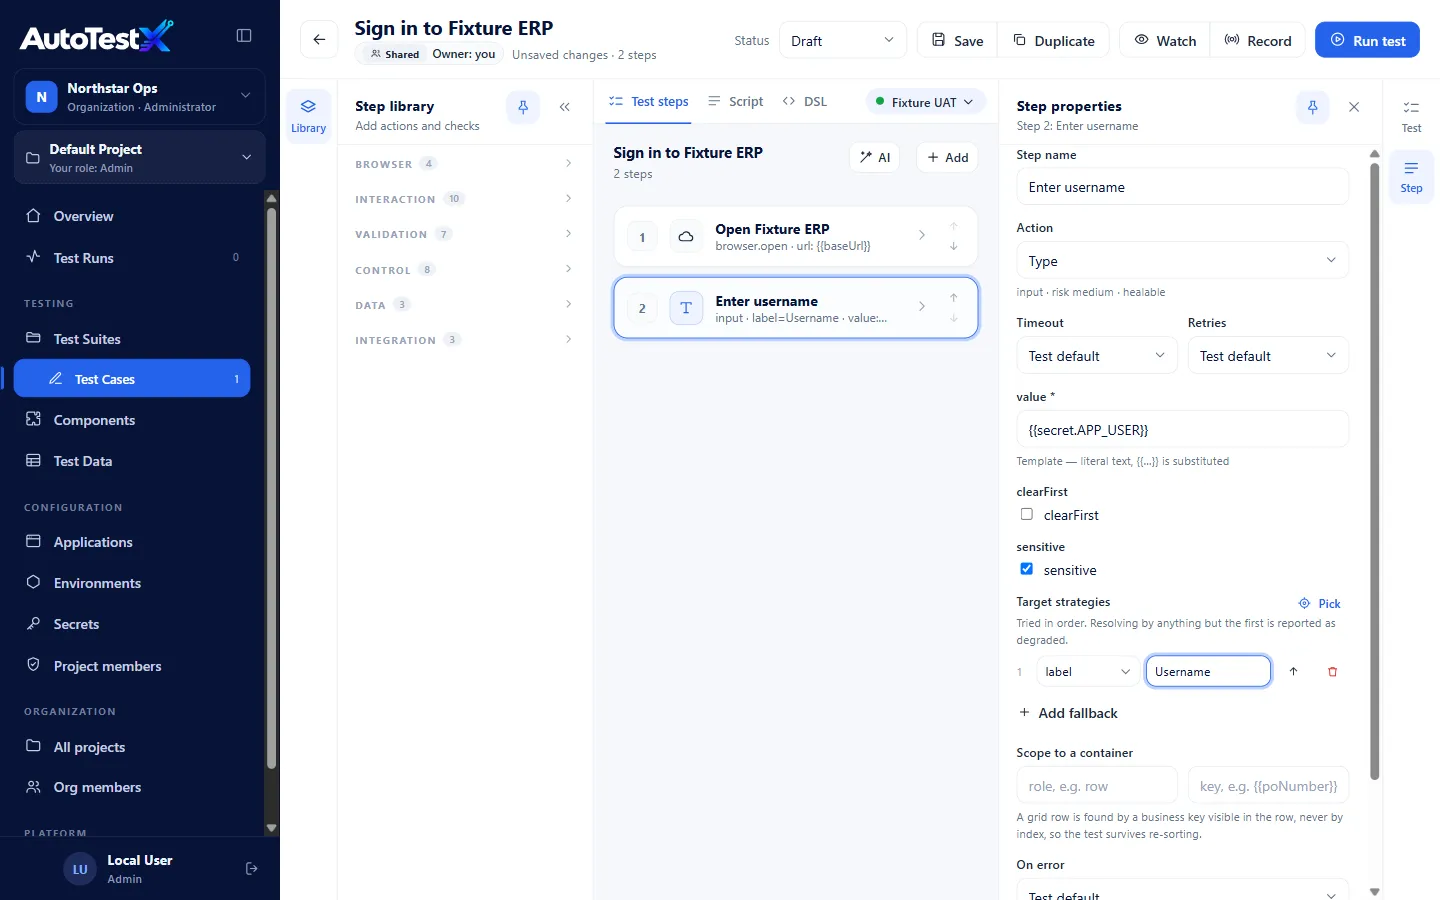
| 2 | Type | Enter username | value: {{secret.APP_USER}}, tick sensitive. Target: strategy label, value Username |
| 3 | Type | Enter password | value: {{secret.APP_PASSWORD}}, tick sensitive. Target: strategy label, value Password |
| 4 | Click | Sign in | Target: strategy testId, value login |
| 5 | Exists | Purchase order list is shown | Target: strategy role, role heading, name Purchase Orders |
How to set a target, the element a step acts on:
- Under Target strategies, the first row has a strategy dropdown (it starts as
testId) and a value box. - Choose the strategy, then type the value. For
role, two boxes appear: the role (heading) and the accessible name (Purchase Orders).
Why
{{secret.APP_USER}}and nottester? A literal password in a test would be visible to everyone who can read the test, and in every report. A secret reference is resolved only inside the runner, and its value is masked everywhere.
When all five steps are in, choose Save (or press Ctrl+S). The header changes from Unsaved changes to Saved · v1.
Step 4: run it
Section titled “Step 4: run it”- Check the environment selector above the steps. It must say Fixture UAT. It starts on the first environment in the list, so if you have several, choose the right one.
- Choose Run test.
Each step turns PASS as it finishes, and a Run result appears under the steps:
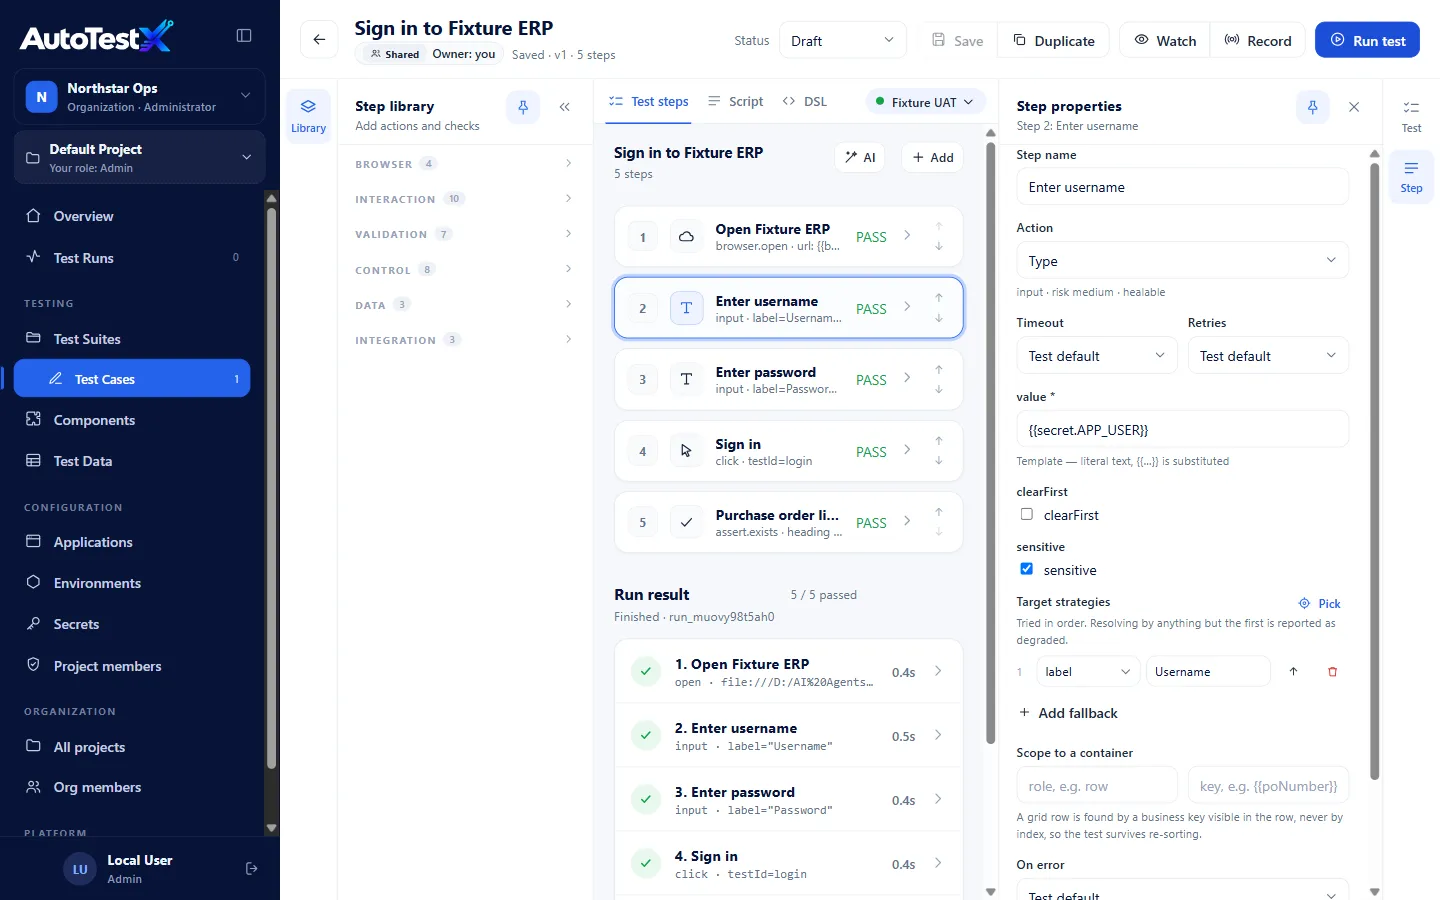
Choose a step in the run result to see what actually happened: the address opened, the locator that matched, how long it took. Every run is also listed under Test Runs, where the full report has a screenshot for each step. See Running tests and reading reports.
What if it fails?
Section titled “What if it fails?”The most common first-run failures are:
| You see | Likely cause |
|---|---|
| No strategy resolved to a usable element… Tried: label=“Username” -> 0 on step 2 | The run used the wrong environment, or baseUrl points to the wrong file. Check the environment selector. |
| Unresolved reference “secret.APP_USER” | The selected environment has no secret with that exact name. Names are case-sensitive. |
| net::ERR_FILE_NOT_FOUND on step 1 | The file:// path in baseUrl is wrong. Paste it into your browser’s address bar to check. |
More in Troubleshooting.
Where to go next
Section titled “Where to go next”- Record instead of typing steps. Choose Record in the editor and use the application. See Recording.
- Describe steps in English. Choose Write with AI. See Write with AI.
- Extend this test. Create a purchase order with a For each loop over order lines.
examples/create-purchase-order.jsonis a complete worked example. See Importing a test file. - Reuse the sign-in. Turn these steps into a Login component that other tests call. See Components.
- Mark it Ready. When the test is stable, set Status to Ready so it is locked and fit for regression runs. See Test cases.